
How to Plan Custom Millwork That Fits Your Home
A built-in that looks right in a showroom can feel crowded, shallow, or poorly placed once it meets the realities of your home. Knowing how to plan custom millwork means making the key decisions before fabrication begins: what the piece needs to hold, how people move around it, where the walls are imperfect, and how the finish will work with everything already in the room.
Custom millwork can solve problems that ready-made cabinetry cannot. It can turn an unused alcove into practical storage, make a kitchen work harder, create a fireplace surround with presence, or give an entryway a place for coats and boots. The best results come from planning the function and construction together, rather than choosing a style first and trying to force it into the space later.
Start With the Job the Millwork Must Do
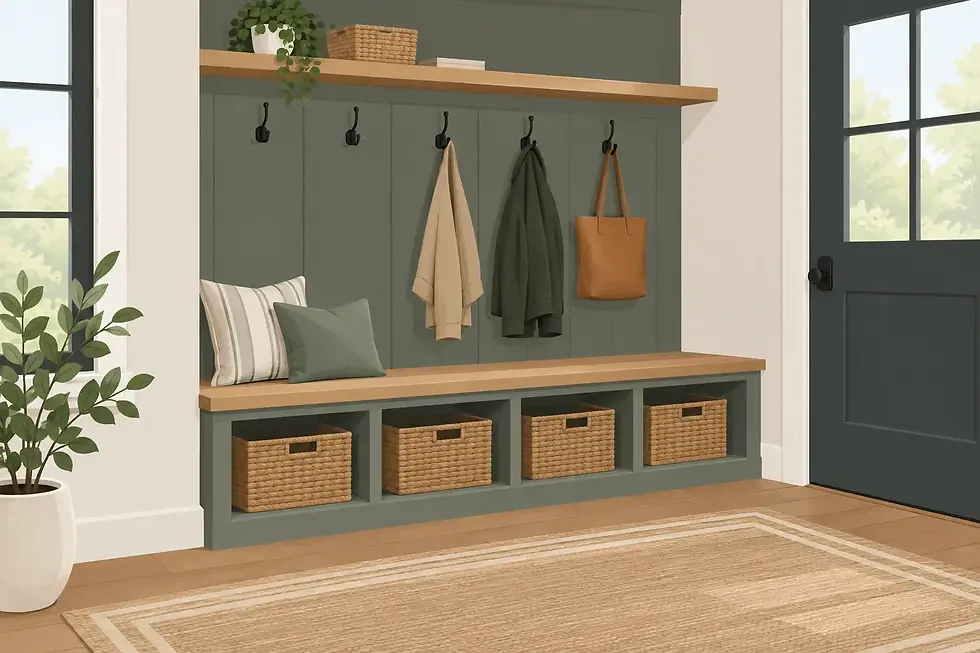
Before discussing door styles, paint colors, or hardware, define the purpose of the piece. A family room built-in may need concealed storage for games and media equipment, adjustable shelving for books, and open space for display. A mudroom unit may need a durable bench, deep drawers, tall lockers, and room for winter gear. Kitchen cabinetry has another set of requirements: workflow, appliance clearances, pantry storage, and durable work surfaces.
Be specific about what will live inside the millwork. Measure the items that matter, including small appliances, binders, serving dishes, baskets, electronics, and oversized cookware. A cabinet planned around a general idea of “more storage” often leaves awkward gaps or shelves that are too shallow to be useful.
It also helps to decide what should stay visible and what should disappear behind doors. Open shelving can make a room feel lighter and gives display pieces a place to stand out. It also requires regular upkeep. Closed cabinetry provides a calmer appearance and hides everyday clutter, but doors add cost and require clearance to open comfortably.
Measure the Room, Not Just the Wall
Millwork is built to fit a specific location, so accurate site information is part of the design. Measure wall width and ceiling height in more than one place. Older homes and renovated spaces are rarely perfectly square, level, or plumb. A wall may be wider at the floor than at the ceiling, and a floor can drop noticeably across a long run of cabinetry.
Record window and door locations, baseboards, vents, radiators, outlets, switches, and return-air grilles. Note the depth of trim around windows and doors. These details affect cabinet depth, panel placement, and how the finished work meets the surrounding surfaces.
For larger projects, a professional field measure should happen before final fabrication. Initial drawings can establish the direction and budget, but final dimensions should be confirmed after demolition, framing changes, or drywall work is complete. This is especially important for built-ins between walls, kitchen cabinetry, and stair components.
Plan for movement and clearances
A beautiful cabinet is not successful if it interrupts how the room works. Consider walking paths, door swings, drawer pulls, and appliance access. In a kitchen, dishwasher doors, refrigerator doors, and oven handles all need room. At an entry bench, leave enough open floor area for someone to sit and remove footwear without blocking the route through the space.
Depth deserves just as much attention as width. Standard base cabinets are useful in kitchens because they support a workable countertop depth. A living room built-in may need less depth so it does not dominate the room. Shallow cabinetry can be surprisingly effective for books, linens, glassware, or media storage, provided it is designed around the items it will hold.
Choose a Style That Belongs in the House
Custom work should feel intentional, not copied from a photo without regard for the rest of the home. Look at existing trim profiles, interior doors, flooring, stair parts, and the age of the house. A simple flat-panel cabinet may suit a clean, contemporary renovation, while a traditional home may call for framed doors, detailed crown molding, or a warmer wood finish.
That does not mean every room must match exactly. A kitchen can have its own character while still sharing a few visual cues with the rest of the house, such as hardware finish, wood tone, panel proportions, or trim detail. Repeating one or two elements creates continuity without making the home feel overly coordinated.
Gather reference images, but identify what you actually like about each one. It may be the painted finish, the symmetry around a fireplace, the thickness of the shelves, or the way integrated lighting highlights a display area. Clear references help turn a broad preference into buildable details.
Select Materials for Use, Location, and Finish
The material behind the visible finish matters. Solid wood offers warmth and repairability, but it moves with seasonal humidity changes and should be used thoughtfully in wide panels and long runs. Veneered plywood is stable, strong, and often a good choice for cabinet boxes, shelves, and painted or stained components. MDF provides a smooth surface for paint and can produce crisp routed details, though it is not the best choice where repeated moisture exposure is likely.
For kitchens, laundry rooms, and entryways, durability should guide the decision. Consider where water, wet boots, cleaning products, and daily impacts will occur. Interior cabinet boxes may use different materials than exposed end panels, door fronts, or a bench top. This is normal and often produces a better balance of performance, appearance, and budget.
The finish should be decided early because it affects material selection, construction, and lead time. Painted millwork can offer a tailored look and broad color flexibility. Natural wood finishes highlight grain and variation, which is part of their appeal, but samples are essential. Lighting can make the same stain appear substantially different from one room to another.
Design the Details Before They Become Problems
The details are where custom millwork earns its value. Decide early how panels meet walls, whether crown molding will run to the ceiling, where filler strips may be needed, and how the base of the cabinetry will align with existing trim. Consider whether shelves need to be adjustable, whether drawers need full-extension slides, and whether doors should have soft-close hinges.
For media units, plan wire paths, ventilation, and accessible outlets. For a kitchen, choose appliance models before final cabinet dimensions are approved. For a desk area, account for leg room, task lighting, and cable management. These are small decisions on paper, but they are difficult and costly to change after installation.
A useful planning conversation should cover at least these five points:
The storage and daily-use needs of the household
Exact site measurements and conditions behind the walls
Cabinet layout, clearances, and door or drawer operation
Material, finish, hardware, and lighting selections
Installation timing in relation to flooring, paint, countertops, and other trades
Set a Budget Around Priorities
Custom millwork pricing is shaped by more than the overall size of the project. Material choice, door style, drawer count, finish level, integrated lighting, specialty hardware, site conditions, and installation complexity all influence cost. A long wall of simple painted cabinetry may cost less than a smaller unit with many drawers, fluted panels, glass doors, and detailed trim.
Be honest about where craftsmanship will have the greatest impact. If the project is a family room built-in, you may prioritize strong cabinet construction, clean face-frame alignment, and durable hardware while simplifying decorative elements. In a kitchen renovation, it may make sense to invest in the drawers, pantry organization, and cabinet layout used every day, then choose a more restrained door profile.
A contingency is sensible when the project includes renovation work. Opening walls can reveal electrical, plumbing, framing, or leveling issues that need attention before millwork is installed. Addressing those conditions properly protects the finished work and avoids fitting expensive cabinetry around an unresolved problem.
Coordinate Millwork With the Renovation Schedule
Millwork should not be treated as the final decorative layer of a renovation. It needs coordination with electrical, plumbing, HVAC, flooring, tile, paint, and countertops. Outlet locations may need to move. Blocking may be required inside walls to support floating shelves, heavy cabinets, or handrails. Flooring decisions affect cabinet heights and toe kicks.
In many cases, cabinetry is installed after major drywall and painting work but before countertops, final trim touchups, or certain finish items. The sequence depends on the project. A well-managed schedule protects finished surfaces and gives each trade the access needed to do clean work.
For homeowners planning a larger renovation, working with a contractor who understands both the millwork and the broader construction scope can reduce handoff issues. Heritage Green Carpentry approaches custom kitchens, built-ins, staircases, and renovation details with that coordination in mind, so the finished carpentry is considered alongside the room around it.
Approve Drawings and Samples With Care
Before construction begins, review drawings for overall dimensions, cabinet configuration, shelf spacing, hardware placement, and visible proportions. Stand in the room with the drawings if possible. A dimension that seems reasonable on paper can feel very different when you picture it at full scale.
Finish samples are equally valuable. Look at them beside flooring, wall paint, countertops, and existing furniture, preferably under the room’s natural and artificial light. If a wood finish has natural variation, expect the completed piece to have character rather than an identical grain pattern on every door.
The goal is not to eliminate every decision before the work starts. It is to resolve the decisions that affect fit, cost, and construction while there is still time to make changes thoughtfully. Good custom millwork feels effortless after installation because the hard thinking happened long before the first cabinet is set in place.


Comments